.png)
Vector drives are crucial for handling motor speed control with precision and efficiency in modern manufacturing. When systems falter, you must repair or rebuild the vector drive to sustain productivity and extend the lifespan of equipment. Understanding the steps involved, from identifying issues to implementing repairs, ensures smooth operations and reduces costly downtime.
This guide explains why vector drives are vital in manufacturing, details common causes of failures, and breaks down the vector drive rebuilding process step by step. Learn the value of timely maintenance and professional expertise in rebuilding vector drives for optimal performance.
What Is a Vector Drive?
A vector drive is an advanced motor controller designed to regulate the speed, torque, and position of motors with outstanding precision. Unlike traditional drives, vector drives use algorithms to determine motor behavior, which results in high performance suited to demanding manufacturing environments. These systems power various automated machinery, from CNC machines to conveyor systems.
Reliable vector drives ensure smooth acceleration, enhanced torque control, and efficient energy usage. They remain vital to production processes, which is why you must promptly attend to drive issues to prevent extended downtime.
Importance of Rebuilding Vector Drives
Rebuilding vector drives is a smart solution to restore equipment functionality while avoiding the costs of replacing the entire unit. This process addresses current issues and improves performance and prepares the system for continued operation under rigorous workloads. Rebuilding reduces waste and extends the lifespan of equipment by utilizing existing components where feasible.
Identifying problems early leads to quicker, more cost-effective and more efficient repairs. Routine maintenance and professional assistance make vector drive rebuilding a smart long-term investment for any manufacturing setup.
Common Causes of Vector Drive Failures
Several factors contribute to vector drive failures. Some issues stem from daily wear and tear, while others result from improper usage or external influences. Here are some common issues to note.
Software Issues
Software-related problems such as faulty firmware updates or programming errors can disrupt vector drive functionality. These issues often manifest as communication errors, unexpected shutdowns, or erratic motor behavior. Addressing software irregularities requires recalibration or reinstallation of programs.
Electrical Issues
Electrical malfunctions are a frequent cause of vector drive failures. Power surges, short circuits, or faulty connections can damage internal circuitry and disrupt operation. Incorrect voltage levels due to unstable power supplies also pose a threat. Regular inspections to manage electrical integrity will help minimize these risks.
Overheating
Excessive heat buildup from insufficient ventilation or malfunctioning cooling systems can lead to operational inefficiencies and component degradation. Overheating forces components beyond their capacity, causing permanent damage if you don’t address the problem. Adequate cooling mechanisms and temperature monitoring can help prevent such issues.
Wear and Tear/Age
Like any electronic device, vector drives undergo wear and tear over time. Components such as capacitors, resistors, and fans degrade with regular use, reducing reliability and efficiency. Aging parts require replacement to ensure continued functionality.
Tools Involved in Rebuilding Vector Drives

Rebuilding vector drives requires specialized tools to guarantee accuracy and safety. These tools may include multimeters, oscilloscopes, torque wrenches, soldering equipment, thermal scanners, and software diagnostic tools. Each tool plays a crucial role in identifying, repairing, and testing individual components during the rebuilding process.
Professionals rely on these tools to ensure precision in every step, safeguarding the system’s performance and stability. They’ll also need the proper PPE, including protective eyewear, gloves, and protective clothing to ensure safety during the repairs.
Steps in the Vector Drive Rebuilding Process
The vector drive rebuilding process follows several steps to promote high-quality repairs. Here are the primary stages in this process.
Take Safety Precautions
Safety is paramount when working with vector drives. Before starting, the technician will power down the equipment and disconnect it from all energy sources, including electricity and stored charges in the system. Double-check by using a voltage tester to confirm there is no residual current.
Use personal protective equipment (PPE) such as insulated gloves, safety glasses, and work boots to protect yourself from potential electrical shocks or debris during the process. Maintain a clean, organized workspace to reduce the risk of accidents.
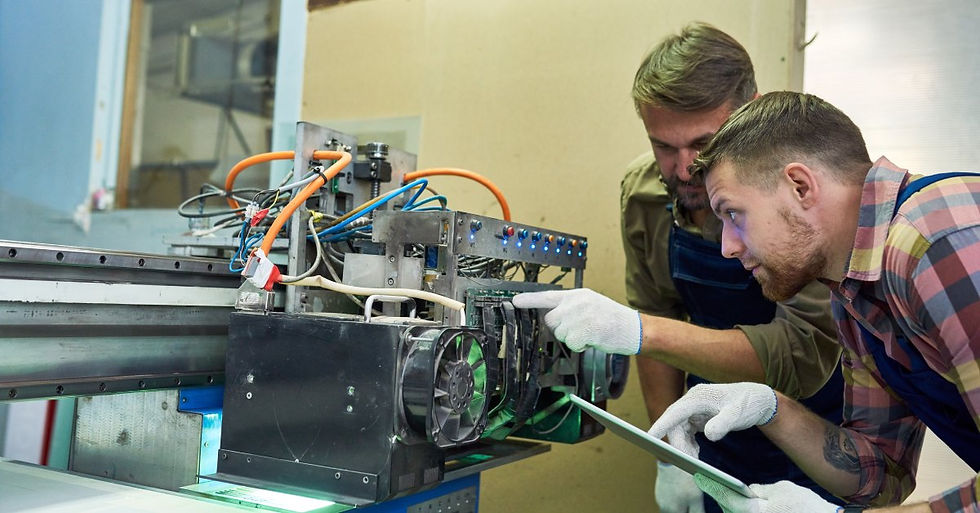
Remove and Disassemble Internal Components
Start by carefully removing the vector drive from the machinery. Make sure to label and document all connections for simple reassembly later. Take your time detaching wires and connectors to avoid accidental damage.
After removing a drive, systematically disassemble its internal components. Pay close attention to the arrangement of parts, making detailed notes or taking photos to ensure proper reassembly. Organize screws, washers, and smaller components using labeled trays or bags to prevent misplacement or confusion.
Inspect and Clean Components
Thoroughly inspect all components for signs of wear, damage, or contamination, such as cracks, corrosion, or dirt buildup. Pay special attention to areas prone to heat or stress, as they are more likely to experience wear. Clean each part meticulously using appropriate tools and cleaning agents, such as compressed air for dust or isopropyl alcohol for electronic components.
Removing dirt, debris, and residue enhances functionality and helps identify hidden issues you may not immediately notice. This step helps differentiate parts requiring immediate replacement from those still in good working condition.
Replace Components
Replace all faulty or worn-out components with new, manufacturer-approved parts to ensure reliability and compatibility. Focus on high-wear items such as capacitors, resistors, diodes, cooling fans, and connectors, as these are the parts most likely to degrade over time.
If certain components show only minor wear, consider replacing them preemptively to avoid future failures. Double-check that replacement parts match the original specifications to maintain optimal performance. Properly installing new components is critical to ensure the rebuilt vector drive functions as you need it to.
Calibrate and Test the Machine
Once the components are replaced, carefully reassemble the vector drive, following the notes or photos taken during disassembly. Reconnect the drive to the machinery and perform an initial diagnostic check using appropriate tools or software to verify that everything is properly aligned and functioning.
Next, calibrate the system to meet performance requirements, ensuring accuracy and efficiency. Test the system to identify and address lingering issues. Monitor for unusual noises, overheating, or performance inconsistencies during testing to guarantee seamless operation.
Reassemble and Secure Connections
After the vector drive successfully passes all performance tests, finalize the rebuilding process by securely reassembling all components and connections. Tighten screws, bolts, and wiring, ensuring everything is stable and properly grounded. Double-check all wiring to confirm stability and reliability during continuous use, as loose connections can lead to further issues. Once you have fully assembled the equipment, conduct one final test to ensure optimal functionality before putting it back into regular operation.

Common Vector Drive Repair Techniques
Various techniques can address common repair scenarios during the rebuilding process. Circuit board repairs often involve soldering damaged connections or replacing burned-out components. Software recalibration ensures the drive operates within specified parameters, while thermal management strategies prevent overheating.
Take Action To Sustain Equipment Performance
Vector drives are indispensable in manufacturing, making their upkeep essential for smooth operations. By understanding the vector drive rebuilding process and addressing problems promptly, you protect your equipment and maximize productivity. Routine maintenance and expert support further sustain system reliability.
If your vector drives need attention, consider a professional rebuilding service to achieve the best results. Contact CNC Service today for Haas drive repair and more to restore your systems for superior performance. We can help get your systems up and running to minimize downtime and promote more efficient workflows.
Comments